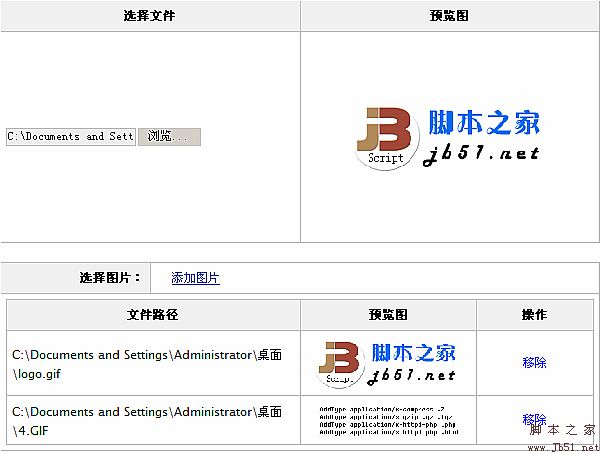
JavaScript 图片预览效果 推荐
上次写的简便无刷新文件上传系统最初的目的就是用来实现这个图片预览效果。
兼容:ie6/7/8, firefox 3.5.5
后台支持下还兼容:opera 10.10, safari 4.0.4, chrome 3.0
ps:兼容opera, safari和chrome需要后台支持,请下载实例测试。
程序说明
【基本原理】
图片预览主要包括两个部分:从file表单控件获取图像数据,根据数据显示预览图像。
程序的file和img属性就是用来保存file控件和显示预览图像的容器的,而img还必须是img元素。
程序有以下几种预览方式:
simple模式:直接从file的value获取图片路径来显示预览,适用于ie6;
filter模式:通过selection获取file的图片路径,再用滤镜来显示预览,适用于ie7/8;
domfile模式:调用file的getAsDataURL方法获取Data URI数据来显示预览,适用于ff3;
remote模式:最后的办法,把file提交后台处理后返回图片数据来显示预览,全适用。
程序定义时就自动根据浏览器设置MODE属性:
$$B.firefox
? "domfile" :$$B.opera
|| $$B.chrome || $$B.safari ? "remote" : "simple";如果用能力检测会比较麻烦,所以只用了浏览器检测。
由于浏览器对应的默认模式是不会变的,这个值直接会保存到函数属性中作为公用属性。
ps:ie6也可以用filter模式,不过它有更好的simple模式。
【获取数据】
调用preview方法,就会执行预览程序:
this._preview( this._getData() );
}
在通过检测后,再调用_getData获取数据,并作为_preview的参数进入预览下一步。
程序初始化时就会根据mode来设置_getData数据获取程序:
this._getData = this._getDataFun(opt.mode);
mode的默认值是ImagePreview.MODE,也可以在可选参数中自定义。
由于兼容性问题,一般应保留默认值,除非是使用全兼容的remote模式。
在_getDataFun里面,根据mode返回数据获取程序:
case "filter" :
return this._filterData;
case "domfile" :
return this._domfileData;
case "remote" :
return this._remoteData;
case "simple" :
default :
return this._simpleData;
}
不同的模式有不同的数据获取程序:
滤镜数据获取程序:
try{
return document.selection.createRange().text;
}
finally { document.selection.empty(); }一般用在ie7/8,在file控件select后再用selection对象获得文件本地路径。
此时file控件不能隐藏,否则不能被select,不过一般能选择文件就肯定能被select了。
确实要隐藏也可以在获取数据之后再隐藏。
domfile数据获取程序:
用getAsDataURL从file控件获取数据,这个方法暂时只有ff3支持。
远程数据获取程序:
this._upload && this._upload.upload();
用_upload上传文件对象把数据提交后台,根据返回的数据再显示。
这个方法不属于本地预览,是没有办法中的办法。
一般数据获取程序:
最原始的方法,现在只有ie6还支持从file的value直接获取本地路径。
获取的数据作为参数,在_preview预览程序中进行预览:
this._data = data; this._show();
}
首先排除空值或相同值的情况,再执行_show预览显示程序,其中_data属性用来保存当前的图片数据。
图片使用Data URI数据时可能会设置一个很大的src值,在ie8获取很大的src值会出现“无效指针”的错误。
使用_data属性保存这个值可以避免从src获取值而触发这个错误。
远程数据获取程序没有返回值,因为它需要等待返回数据,在_preview中会自动排除。
【显示预览】
程序初始化时就会根据mode来设置_show预览显示程序:
除了filter模式,都是使用_simpleShow显示程序来显示预览图片的。
里面会先调用_simplePreload方法设置一般预载图片对象:
preload.onload
= function(){ oThis._imgShow( oThis._data, this.width, this.height ); };preload.onerror
= function(){ oThis._error(); };预载图片对象保存在_preload属性中,主要用来判断图像能否加载成功并获取图片原始尺寸。
要实现这些功能只要用Image对象就足够了。
在onload中执行_imgShow显示预览,在onerror中进行出错处理。
ps:ff、chrome和safari的图片对象还有naturalHeight和naturalWidth属性可以获取图片的原始尺寸。
然后设置_preload的src预载图片,如果成功预载就会执行_imgShow显示预览。
要注意src的设置要在onload/onerror的设置之后,否则设置之前就加载完成的话就触发不了事件了。
_imgShow需要三个参数,包括要预览图片的src值,图片原始宽度和图片原始高度。
在_imgShow里面首先设置预览图片的尺寸:


ratio
= Math.max( 0, this.ratio ) || Math.min( 1,Math.max(
0, this.maxWidth ) / width || 1,Math.max(
0, this.maxHeight ) / height || 1);
style.width
= Math.round( width * ratio ) + "px";style.height
= Math.round( height * ratio ) + "px";这里的关键是获取ratio比例值,如果自定义的ratio大于0就直接使用自定义的比例,否则就根据参数自动计算。
自动计算首先要确保maxWidth最大宽度和maxHeight最大高度大于等于0。
然后分别跟原始宽高做“/”运算得到比例,如果比例为0表示不限制,那么比例就自动改为1。
最后取比较小的比例来计算,程序设定了比例最大值为1,这样就不会自动放大图片了。
当然比例的计算可以根据需要自行修改。
ps:style的优先级比属性(width/height)高,所以要用style设置。
最后设置img的src就实现预览了。
【remote模式】
remote模式会先提交file控件到后台,通过返回图片数据来显示图片。
它跟其他模式最大的区别就是获取数据的部分。
在_remoteData远程数据获取程序中,会调用_setUpload来设置上传文件对象。
如果设置了action,并存在QuickUpload函数,就会进行实例化一个上传文件对象保存到_upload中:
this._upload = new QuickUpload(this.file, {
onReady:
function(){this.action = oThis.action; this.timeout = oThis.timeout;
var parameter = this.parameter;
parameter.ratio
= oThis.ratio;parameter.width
= oThis.maxWidth;parameter.height
= oThis.maxHeight;},
onFinish:
function(iframe){try{
oThis._preview( iframe.contentWindow.document.body.innerHTML );
}
catch(e){ oThis._error("remote error"); }},
onTimeout:
function(){ oThis._error("timeout error"); }});
这里使用的QuickUpload就是简便无刷新文件上传程序。
在onReady中设置参数,在onFinish中处理返回数据,onTimeout进行出错处理。
返回的数据可以是图片的地址或对应Data URI数据,然后给_preview处理。
当然针对不同的后台输出,数据处理的方式也不同,可以按照需要修改。
后台最好先根据传递的参数缩小图片,尽量减少返回数据来提高预览速度。
【filter模式】
filter模式在_filterData程序中得到文件本地路径,但ie7/8都不允许直接使用本地路径显示图片。
不过还是可以通过滤镜,用本地路径来做预览图片效果。
filter模式使用_filterShow方法来显示预览图片。
里面先调用_filterPreload方法来设置滤镜预载图片对象。
跟一般预载图片对象不同,滤镜预载对象是用滤镜来显示图片,所以并不一定要图像元素。
程序就使用了div元素作为滤镜预载对象:
$$D.setStyle( preload, {
width:
"1px", height: "1px",visibility:
"hidden", position: "absolute", left: "-9999px", top: "-9999px",filter:
"progid:DXImageTransform.Microsoft.AlphaImageLoader(sizingMethod='image')"});
var body = document.body; body.insertBefore( preload, body.childNodes[0] );
在样式设置中隐藏元素并添加滤镜,要使滤镜生效width和height必须设置一个值。
由于要获取尺寸,只能用visibility来隐藏并插入body,关于AlphaImageLoader滤镜后面再介绍。
然后在_filterShow中预载图片:
preload.filters.item(
"DXImageTransform.Microsoft.AlphaImageLoader").src = data;}
catch(e){ this._error("filter error"); return; }成功的话,再给img载入图片:
最后调用_imgShow设置尺寸:
由于img是一个图片对象,默认会显示一个小图标,为了去掉这个小图标,可以让它显示一个透明图片。
程序传递了ImagePreview.TRANSPARENT来设置透明图片,具体数据在Data URI 和 MHTML再说明。
ps:当然也可以在filter模式用div做预览图片对象就没有小图标了,但这样兼容起来会麻烦很多。
【AlphaImageLoader滤镜】
filter模式使用的是AlphaImageLoader滤镜。
它的作用是在对象容器边界内,在对象的背景和内容之间显示一张图片。
如果载入的是png图片,其透明度会被支持,可以用来解决png的兼容问题。
详细参考msdn的AlphaImageLoader Filter和“Microsoft.AlphaImageLoader滤镜讲解”。
它包括三个属性:enabled(滤镜是否激活),sizingMethod(图像显示方式)和src(图像路径)。
程序主要使用后面两个属性。
sizingMethod有三种方式:
crop:剪切图片以适应对象尺寸;
image:默认值。增大或减小对象的尺寸边界以适应图片的尺寸;
scale:缩放图片以适应对象的尺寸边界。
对于预载图片对象_preload,要获取图片的原始尺寸,所以要用image方式。
而预览图片对象img,则要根据设定尺寸显示图片,所以要用scale方式。
而src属性的路径还支持本地路径,是实现filter模式的关键所在。
幸运的是滤镜并没有像file控件那样提高安全性,否则就没办法实现图片本地预览了。
【nsIDOMFile接口】
ff从3.0(或更早)开始,就不能通过value获取file的完整路径,也不支持直接用本地路径显示图片。
不过欣喜的是,它同时也提供了nsIDOMFile接口,能更好地获取文件数据。
在ff的file控件有一个FileList对象,包含了带nsIDOMFile接口的File对象。
ps:FileList对象貌似是一个NodeList对象,但目前只能用第一个,可能是为了将来实现一个file控件选择多个文件的功能预留的。
这个File对象有三个获取文件数据的方法:
getAsText:获取文件的文本数据,可以通过参数设置编码;
getAsDataURL:获取文件的Data URI数据;
getAsBinary:获取文件的二进制数据。
其中getAsDataURL获得的Data URI数据可以用于显示图片,_domfileData中就是用它来获取数据的。
File对象还有支持两个属性:fileName(文件名,不包括路径)和fileSize(文件大小)。
相关具体说明参考mozilla的File和nsIDOMFile。
【Data URI 和 MHTML】
上面已经多次提到Data URI,详细介绍请看秦歌的“Data URI 和 MHTML”。
Data URI的主要作用是以字符代替数据,从而把文件“嵌”在代码里。
除了ie,其他浏览器基本都很好的支持了Data URI。
ie8也有限度地支持,详细参考msdn的data Protocol。
由于opera,safari和chrome需要remote模式的浏览器都支持Data URI,所以程序返回的是Data URI形式的数据。
相比返回路径的方法,返回Data URI不需要创建文件,还少一次HTTP请求。
ps:ie8只支持32k的Data URI数据,在ie8使用时要注意数据大小。
在filter模式需要一个透明图片来去掉img默认显示的小图标,一般的方法需要一个图片文件。
为了“省下”这个文件,可以使用Data URI来做一个1*1的透明图片:
支持Data URI的情况下,只要把img的src设置为这个值就可以显示一个透明图片了。
虽然ie6/7不支持Data URI,还可以用mhtml来代替。
在ImagePreviewd.js开头有一段注释了的代码:
--_CLOUDGAMER
Content
-Location:blankImageContent
-Transfer-Encoding:base64R0lGODlhAQABAJEAAAAAAP
///////wAAACH5BAEAAAIALAAAAAABAAEAAAICVAEAOw==这是mhtml记录数据的形式,调用时要按以下格式设置img的src:
mhtml:文件完整路径!blankImage
其中blankImage表示要获取的数据在文件对应的Content-Location。
问题在于如何获得script(js文件)的完整路径(包含http开头的路径)。
首先要在脚本运行时获取,当前运行的script肯定是document.scripts的最后一个:
document.scripts[document.scripts.length - 1]
ps:document.scripts详细参考msdn的scripts Collection,ff不支持,可以用getElementsByTagName("script")兼容。
接着可以利用getAttribute从src获取script的完整路径:
ie6/7的getAttribute支持第二个参数,设为4表示返回完整路径的url地址,详细参考msdn的getAttribute Method。
结合Data URI 和 MHTML可以这样得到透明图片数据:
"mhtml:" + document.scripts[document.scripts.length - 1].getAttribute("src", 4) + "!blankImage" :
"data:image/gif;base64,R0lGODlhAQABAIAAAP///wAAACH5BAEAAAAALAAAAAABAAEAAAICRAEAOw==";
使用时要注意:
脚本必须单独另存为一个文件,作为mhtml需要的文件路径。
要自动获取完整路径需要用script标签链接文件。
【超空间】
程序还有一个dispose方法用于销毁程序。
包括这几个部分:
_upload上传文件对象:它本身已经有一个dispose方法来销毁程序;
_preload预载图片对象:先清除它的onload/onerror事件再移除元素;
file和img属性:直接设为null,由于不是程序创建的元素,留给使用者来移除。
说到移除元素,顺便说一下超空间(DOM hyperspace),这是从“ppk谈javascript”中看到的。
大概指的是当元素不在dom里面,而js又有关联时,元素并不会消失,而是保存在一个称为“超空间”的地方。
详细参考书的DOM 超空间部分。
书中还说可以根据是否有parentNode来判断元素是否在超空间,但测试以下代码:
<script>
var elm = document.createElement("div");
alert(elm.parentNode);
document.body.removeChild(document.body.appendChild(elm));
alert(elm.parentNode);
</script>
第一次parentNode都是null,没有问题,按理第二次也应该是null,但ie却是一个object。
经测试,这个object的nodeType是11,也就是一个碎片对象(FRAGMENT)。
而且各个被removeChild移除的元素的parentNode都不相同,即会生成不同的碎片对象。
这种情况算不算在“超空间”呢,不过书中也只是说“一般来说”,也不用太考究。
那么用innerHTML清除呢?再测试以下代码:
<script>
var elm = document.getElementById("test");
document.body.innerHTML
= "";alert(elm.parentNode);
</script>
结果在ie也是null了,看来removeChild和innerHTML在清除元素时产生了不同的结果。
那个碎片对象貌似没什么用(难道为了保证有parentNode?),那是不是innerHTML就一定比removeChild好呢?
再测试以下代码:
<style>div{border:1px solid #000; height:20px;}</style>
<span><div id="test1">test1</div></span>
<span><div id="test2">test2</div></span>
</body>
<script>
var div1 = document.getElementById("test1"), parent1 = div1.parentNode;
parent1.removeChild(div1);
alert(div1.tagName
+ ":" + div1.innerHTML);parent1.appendChild(div1);
var div2 = document.getElementById("test2"), parent2 = div2.parentNode;
parent2.innerHTML
= "";alert(div2.tagName
+ ":" + div2.innerHTML);parent2.appendChild(div2);
</script>
当使用removeChild时,移除元素的结构并没有发生变化,各个浏览器的效果都一样。
而使用innerHTML清除时,其他浏览器的效果跟removeChild一样,但在ie被移除的元素就只剩下一个“外壳”了。
个人推测,ie在使用innerHTML时,被移除的元素会变成一个个单独的元素,失去了彼此的联系。
形象点说就是removeChild是直接掰断树枝,还能继续嫁接使用,而innerHTML是把需要的树叶节点取下来,再把树枝烧掉。
ps:仅仅是推测,谁有官方资料请告诉我。
那么removeChild的好处是移除的元素能再次使用,兼容性好,不好的地方是ie会产生一个没用的碎片对象。
而innerHTML的好处是不会产生多余的碎片对象,方便高效,但在ie被移除的元素基本不能再用,有兼容性问题。
那就可以根据需要使用不同的方法了,至于防止内存泄漏用那个好,感觉是innerHTML,但没有更深入研究的话还说不清楚。
使用技巧
一般来preview方法都是在onchange中调用,即选择文件后立即显示预览。
在不需要程序时最好执行一次dispose方法来销毁程序,防止内存泄漏等。
利用ImagePreview.TRANSPARENT可以显示透明图片,而不需另外隐藏或增加文件。
第二个实例中的ResetFile是用来重置file控件的,详细参考这里file的reset。
而file控件样式设置详细参考这里的file样式。
asp版本使用Persits.Jpeg组件缩放图片,测试请先安装该组件。
使用说明
实例化时,有两个必要参数,分别是file控件对象和img元素的预览显示对象:
可选参数用来设置系统的默认属性,包括:
属性: 默认值//说明
mode: ImagePreview.MODE,//预览模式
ratio: 0,//自定义比例
maxWidth: 0,//缩略图宽度
maxHeight: 0,//缩略图高度
onCheck: function(){},//预览检测时执行
onShow: function(){},//预览图片时执行
onErr: function(){},//预览错误时执行
以下在remote模式时有效
action: undefined,//设置action
timeout: 0//设置超时(0为不设置)
如果要使用remote模式必须设置一个action。
还提供了以下方法:
preview:执行预览操作;
dispose:销毁程序。
程序源码
this.file = $$(file);//文件对象
this.img = $$(img);//预览图片对象
this._preload = null;//预载图片对象
this._data = "";//图像数据
this._upload = null;//remote模式使用的上传文件对象
var opt = this._setOptions(options);
this.action = opt.action;
this.ratio = opt.ratio;
this.maxWidth = opt.maxWidth;
this.maxHeight = opt.maxHeight;
this.onCheck = opt.onCheck;
this.onShow = opt.onShow;
this.onErr = opt.onErr;
//设置数据获取程序
this._getData = this._getDataFun(opt.mode);
//设置预览显示程序
this._show = opt.mode !== "filter" ? this._simpleShow : this._filterShow;
};
//根据浏览器获取模式
ImagePreview.MODE = $$B.ie7 || $$B.ie8 ? "filter" :
$$B.firefox
? "domfile" :$$B.opera
|| $$B.chrome || $$B.safari ? "remote" : "simple";//透明图片
ImagePreview.TRANSPARENT = $$B.ie7 || $$B.ie6 ?
"mhtml:" + document.scripts[document.scripts.length - 1].getAttribute("src", 4) + "!blankImage" :
"data:image/gif;base64,R0lGODlhAQABAIAAAP///wAAACH5BAEAAAAALAAAAAABAAEAAAICRAEAOw==";
ImagePreview.prototype
= {//设置默认属性
_setOptions: function(options) {
this.options = {//默认值
mode: ImagePreview.MODE,//预览模式
ratio: 0,//自定义比例
maxWidth: 0,//缩略图宽度
maxHeight: 0,//缩略图高度
onCheck: function(){},//预览检测时执行
onShow: function(){},//预览图片时执行
onErr: function(){},//预览错误时执行
//以下在remote模式时有效
action: undefined,//设置action
timeout: 0//设置超时(0为不设置)
};
return $$.extend(this.options, options || {});
},
//开始预览
preview: function() {
if ( this.file && false !== this.onCheck() ) {
this._preview( this._getData() );
}
},
//根据mode返回数据获取程序
_getDataFun: function(mode) {
switch (mode) {
case "filter" :
return this._filterData;
case "domfile" :
return this._domfileData;
case "remote" :
return this._remoteData;
case "simple" :
default :
return this._simpleData;
}
},
//滤镜数据获取程序
_filterData: function() {
this.file.select();
try{
return document.selection.createRange().text;
}
finally { document.selection.empty(); }},
//domfile数据获取程序
_domfileData: function() {
return this.file.files[0].getAsDataURL();
},
//远程数据获取程序
_remoteData: function() {
this._setUpload();
this._upload && this._upload.upload();
},
//一般数据获取程序
_simpleData: function() {
return this.file.value;
},
//设置remote模式的上传文件对象
_setUpload: function() {
if ( !this._upload && this.action !== undefined && typeof QuickUpload === "function" ) {
var oThis = this;
this._upload = new QuickUpload(this.file, {
onReady:
function(){this.action = oThis.action; this.timeout = oThis.timeout;
var parameter = this.parameter;
parameter.ratio
= oThis.ratio;parameter.width
= oThis.maxWidth;parameter.height
= oThis.maxHeight;},
onFinish:
function(iframe){try{
oThis._preview( iframe.contentWindow.document.body.innerHTML );
}
catch(e){ oThis._error("remote error"); }},
onTimeout:
function(){ oThis._error("timeout error"); }});
}
},
//预览程序
_preview: function(data) {
//空值或相同的值不执行显示
if ( !!data && data !== this._data ) {
this._data = data; this._show();
}
},
//设置一般预载图片对象
_simplePreload: function() {
if ( !this._preload ) {
var preload = this._preload = new Image(), oThis = this;
preload.onload
= function(){ oThis._imgShow( oThis._data, this.width, this.height ); };preload.onerror
= function(){ oThis._error(); };}
},
//一般显示
_simpleShow: function() {
this._simplePreload();
this._preload.src = this._data;
},
//设置滤镜预载图片对象
_filterPreload: function() {
if ( !this._preload ) {
var preload = this._preload = document.createElement("div");
//隐藏并设置滤镜
$$D.setStyle( preload, {
width:
"1px", height: "1px",visibility:
"hidden", position: "absolute", left: "-9999px", top: "-9999px",filter:
"progid:DXImageTransform.Microsoft.AlphaImageLoader(sizingMethod='image')"});
//插入body
var body = document.body; body.insertBefore( preload, body.childNodes[0] );
}
},
//滤镜显示
_filterShow: function() {
this._filterPreload();
var preload = this._preload, data = this._data;
try{
preload.filters.item(
"DXImageTransform.Microsoft.AlphaImageLoader").src = data;}
catch(e){ this._error("filter error"); return; }//设置滤镜并显示
this.img.style.filter = "progid:DXImageTransform.Microsoft.AlphaImageLoader(sizingMethod='scale',src='" + data + "')";
this._imgShow( ImagePreview.TRANSPARENT, preload.offsetWidth, preload.offsetHeight );
},
//显示预览
_imgShow: function(src, width, height) {
var img = this.img, style = img.style,
ratio
= Math.max( 0, this.ratio ) || Math.min( 1,Math.max(
0, this.maxWidth ) / width || 1,Math.max(
0, this.maxHeight ) / height || 1);
//设置预览尺寸
style.width = Math.round( width * ratio ) + "px";
style.height
= Math.round( height * ratio ) + "px";//设置src
img.src = src;
this.onShow();
},
//销毁程序
dispose: function() {
//销毁上传文件对象
if ( this._upload ) {
this._upload.dispose(); this._upload = null;
}
//销毁预载图片对象
if ( this._preload ) {
var preload = this._preload, parent = preload.parentNode;
this._preload = preload.onload = preload.onerror = null;
parent
&& parent.removeChild(preload);}
//销毁相关对象
this.file = this.img = null;
},
//出错
_error: function(err) {
this.onErr(err);
}
}
this.ratio = opt.ratio;
this.maxWidth = opt.maxWidth;
this.maxHeight = opt.maxHeight;
this.onCheck = opt.onCheck;
this.onShow = opt.onShow;
this.onErr = opt.onErr;
//设置数据获取程序
this._getData = this._getDataFun(opt.mode);
//设置预览显示程序
this._show = opt.mode !== "filter" ? this._simpleShow : this._filterShow;
};
//根据浏览器获取模式
ImagePreview.MODE = $$B.ie7 || $$B.ie8 ? "filter" :
$$B.firefox
? "domfile" :$$B.opera
|| $$B.chrome || $$B.safari ? "remote" : "simple";//透明图片
ImagePreview.TRANSPARENT = $$B.ie7 || $$B.ie6 ?
"mhtml:" + document.scripts[document.scripts.length - 1].getAttribute("src", 4) + "!blankImage" :
"data:image/gif;base64,R0lGODlhAQABAIAAAP///wAAACH5BAEAAAAALAAAAAABAAEAAAICRAEAOw==";
ImagePreview.prototype
= {//设置默认属性
_setOptions: function(options) {
this.options = {//默认值
mode: ImagePreview.MODE,//预览模式
ratio: 0,//自定义比例
maxWidth: 0,//缩略图宽度
maxHeight: 0,//缩略图高度
onCheck: function(){},//预览检测时执行
onShow: function(){},//预览图片时执行
onErr: function(){},//预览错误时执行
//以下在remote模式时有效
action: undefined,//设置action
timeout: 0//设置超时(0为不设置)
};
return $$.extend(this.options, options || {});
},
//开始预览
preview: function() {
if ( this.file && false !== this.onCheck() ) {
this._preview( this._getData() );
}
},
//根据mode返回数据获取程序
_getDataFun: function(mode) {
switch (mode) {
case "filter" :
return this._filterData;
case "domfile" :
return this._domfileData;
case "remote" :
return this._remoteData;
case "simple" :
default :
return this._simpleData;
}
},
//滤镜数据获取程序
_filterData: function() {
this.file.select();
try{
return document.selection.createRange().text;
}
finally { document.selection.empty(); }},
//domfile数据获取程序
_domfileData: function() {
return this.file.files[0].getAsDataURL();
},
//远程数据获取程序
_remoteData: function() {
this._setUpload();
this._upload && this._upload.upload();
},
//一般数据获取程序
_simpleData: function() {
return this.file.value;
},
//设置remote模式的上传文件对象
_setUpload: function() {
if ( !this._upload && this.action !== undefined && typeof QuickUpload === "function" ) {
var oThis = this;
this._upload = new QuickUpload(this.file, {
onReady:
function(){this.action = oThis.action; this.timeout = oThis.timeout;
var parameter = this.parameter;
parameter.ratio
= oThis.ratio;parameter.width
= oThis.maxWidth;parameter.height
= oThis.maxHeight;},
onFinish:
function(iframe){try{
oThis._preview( iframe.contentWindow.document.body.innerHTML );
}
catch(e){ oThis._error("remote error"); }},
onTimeout:
function(){ oThis._error("timeout error"); }});
}
},
//预览程序
_preview: function (data) {
//空值或相同的值不执行显示
if ( !!data && data !== this._data ) {
this._data = data; this._show();
}
},
//设置一般预载图片对象
_simplePreload: function() {
if ( !this._preload ) {
var preload = this._preload = new Image(), oThis = this;
preload.onload
= function(){ oThis._imgShow( oThis._data, this.width, this.height ); };preload.onerror
= function(){ oThis._error(); };}
},
//一般显示
_simpleShow: function() {
this._simplePreload();
this._preload.src = this._data;
},
//设置滤镜预载图片对象
_filterPreload: function() {
if ( !this._preload ) {
var preload = this._preload = document.createElement("div");
//隐藏并设置滤镜
$$D.setStyle( preload, {
width:
"1px", height: "1px",visibility:
"hidden", position: "absolute", left: "-9999px", top: "-9999px",filter:
"progid:DXImageTransform.Microsoft.AlphaImageLoader(sizingMethod='image')"});
//插入body
var body = document.body; body.insertBefore( preload, body.childNodes[0] );
}
},
//滤镜显示
_filterShow: function() {
this._filterPreload();
var preload = this._preload, data = this._data;
try{
preload.filters.item(
"DXImageTransform.Microsoft.AlphaImageLoader").src = data;}
catch(e){ this._error("filter error"); return; }//设置滤镜并显示
this.img.style.filter = "progid:DXImageTransform.Microsoft.AlphaImageLoader(sizingMethod='scale',src='" + data + "')";
this._imgShow( ImagePreview.TRANSPARENT, preload.offsetWidth, preload.offsetHeight );
},
//显示预览
_imgShow: function(src, width, height) {
var img = this.img, style = img.style,
ratio
= Math.max( 0, this.ratio ) || Math.min( 1,Math.max(
0, this.maxWidth ) / width || 1,Math.max(
0, this.maxHeight ) / height || 1);
//设置预览尺寸
style.width = Math.round( width * ratio ) + "px";
style.height
= Math.round( height * ratio ) + "px";//设置src
img.src = src;
this.onShow();
},
//销毁程序
dispose: function() {
//销毁上传文件对象
if ( this._upload ) {
this._upload.dispose(); this._upload = null;
}
//销毁预载图片对象
if ( this._preload ) {
var preload = this._preload, parent = preload.parentNode;
this._preload = preload.onload = preload.onerror = null;
parent
&& parent.removeChild(preload);}
//销毁相关对象
this.file = this.img = null;
},
//出错
_error: function(err) {
this.onErr(err);
}
}