用js实现的自定义的对话框的实现代码
大家好,我们平时在使用Javascript的时候,经常会需要给用户提供一些反馈信息,完成这个功能有很多种方法。但在平时开发中午我们用的最多的可能就是alert这个函数了(这里只说一般情况,不排除个别高手~),使用这个函数确实很方便,可以很简单的向用户提供一些交互信息。不过它也有很多不足,比如他的外观很简
单,而且不可控制,再有它属于浏览器级别的函数,是由各个浏览器自己实现的,所以在不同的浏览器上面,它的界面都不太一样。如果是在以前,这种情况或许很容
易被大多数用户所接受,不过随着时间的推移,用户越来越希望得到更好的体验。所以现在大家经常会在很多网站上看到JS做出来的各种对话框,这些界面会是用户体
验提升不少,所以今天就说说关于这方面的内容吧,进入正题,不说废话啦~
首先给大家看看效果,先有一个直观的了解:
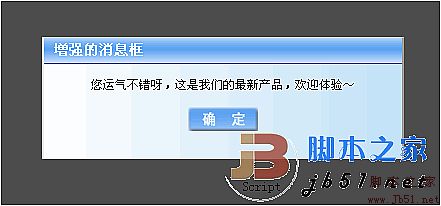
如上图所示,经过我的测试,这个对话框可以使用在IE6 7 8,Firefox,Chrome等多个主流浏览器中。下面就和大家一起看看他的代码吧。
首先,我们需要判断浏览器的类型,这里用了几个bool变量来代表不同的浏览器。
var springweb_typeIsIE = false;
var springweb_typeIsGecko = false;
var springweb_typeIsWebkit = false;
var springweb_typeIsIE6 = false;
var springweb_typeIsIE7 = false;
var springweb_typeIsIE8 = false;
var springweb_typeIsFireFox = false;
var springweb_typeIsChrome = false;
var springweb_typeIsSafari = false;
var agent = window.navigator.userAgent;
if (agent.indexOf("MSIE 6") != -1) {
springweb_typeIsIE6 = true;
springweb_typeIsIE = true;
}
else if (agent.indexOf("MSIE 7") != -1) {
springweb_typeIsIE7 = true;
springweb_typeIsIE = true;
}
else if (agent.indexOf("MSIE 8") != -1) {
springweb_typeIsIE8 = true;
springweb_typeIsIE = true;
}
else if (agent.indexOf("Firefox") != -1) {
springweb_typeIsFireFox = true;
springweb_typeIsGecko = true;
} else if (agent.indexOf("Chrome") != -1) {
springweb_typeIsChrome = true;
springweb_typeIsWebkit = true;
}
else if (agent.indexOf("Safari") != -1) {
springweb_typeIsSafari = true;
springweb_typeIsWebkit = true;
}
如上所示,这里通过检测agent头来判断不同的浏览器,这是一个比较简单的判断方法。
下面开始构造我们的对话框,在构造对话框前,我们先要制造一种模态窗体的效果(就是当对话框弹出来的时候,用户不能操作页面上的其余内容),这里我们就用一个黑色的透明层来完成这样的效果。
document.body.style.overflowY = "hidden";
var divBackground = document.createElement("div");
divBackground.style.position = "absolute";
divBackground.style.left = "0px";
divBackground.style.top = "0px";
divBackground.style.width = "100%";
divBackground.style.height = "100%";
if (springweb_typeIsChrome || springweb_typeIsFireFox) {
divBackground.style.backgroundColor = "rgba(0,0,0,0.7)";
} else {
divBackground.style.backgroundColor = "#000000";
divBackground.style.filter = "alpha(opacity=70)";
}
divBackground.style.zIndex = "99";
document.body.appendChild(divBackground);
上面的代码,我们首先将浏览器的滚动条禁止,以防止用户在弹出对话框的时候滚动浏览器窗口,接下来设定相应的样式,一个比较重要的就是8-13行,这里根据浏览器的类型来应用不同的CSS样式来达到透明的效果,对于IE浏览器,我们使用IE自带的滤镜功能,而对于其他浏览器,我们使用基于CSS3的rgba方式实现透明效果。
接下来,我们要构造对话框,这里首先创建了一个div层,来代表我们整个对话框。方法如下:
var dialogWidth = 260;
var dialogHeight = 120;
var fontSize = 14;
var lineWidth = document.body.clientWidth * 0.7;
if ((fontSize * msg.length) < lineWidth) {
dialogWidth = parseInt(fontSize * msg.length) + 50;
} else {
dialogWidth = parseInt(lineWidth);
dialogHeight += parseInt(((fontSize * msg.length) / lineWidth) * fontSize);
}
divDialog.style.width = dialogWidth + "px";
divDialog.style.height = dialogHeight + "px";
divDialog.style.position = "absolute";
divDialog.style.border = "1px solid #C0D7FA";
divDialog.style.borderRight = "2px outset #DEDEDE";
divDialog.style.borderLeft = "2px outset #DEDEDE";
divDialog.style.left = ((document.body.clientWidth / 2) - (dialogWidth / 2)) + "px";
divDialog.style.top = ((document.body.clientHeight / 2) - (dialogHeight / 2)) + "px";
divDialog.style.zIndex = "100";
这里,首先根据消息的字数计算了对话框的尺寸(这里的计算方法不一定最好,如果有更好的计算方法还望大家指教),后面那些DOM代码就不用我多解释了吧。
接下来,我们创建对话框的标题栏,这个用来显示对话框的标题,并且用它了实现对话框的拖动操作。
var divHead = document.createElement("div");
if (title != undefined) {
divHead.innerHTML = title;
} else {
divHead.appendChild(document.createTextNode("消息"));
}
divHead.style.width = "100%";
divHead.style.height = "25px";
divHead.style.lineHeight = "25px";
divHead.style.fontSize = "14px";
divHead.style.fontWeight = "bold";
divHead.style.borderBottom = "1px outset #8989FF";
divHead.style.color = "white";
divHead.style.textIndent = "10px";
divHead.style.backgroundColor = "blue";
divHead.style.backgroundImage = "url('" + springweb_basePath + "/images/headbg.png')";
divHead.style.cursor = "move";
divHead.onmousedown = function() {
divDialog.dragging = true;
};
divHead.onmouseup = function() {
divDialog.dragging = false;
};
document.body.onmousemove = function(e) {
if (!divDialog.dragging) return;
e = e || window.event;
var mouseX, mouseY;
var mouseOffsetX, mouseOffsetY;
if (e.pageX || e.pageY) {
mouseX = e.pageX;
mouseY = e.pageY;
} else {
mouseX =
e.clientX + document.body.scrollLeft -
document.body.clientLeft;
mouseY =
e.clientY + document.body.scrollTop -
document.body.clientTop;
}
divDialog.style.left = (mouseX - dialogWidth * 0.4) + "px";
divDialog.style.top = (mouseY - 10) + "px";
};
divDialog.appendChild(divHead);
这里呢,有必要说一下的就是,鼠标按下和弹起事件,这里给div对象多增加了一个dragging的属性,用来代表对话框是否正在拖动中(这也是JS的特性之一,对object类型的对象指定新属性的一个方法:如果之前对象没有这个属性,只需通过对象名.属性名="值" 的方式,就可以为对象增加新属性),在鼠标移动事件中,我们通过对象的dragging属性,来决定是否移动对话框,关于对话框的移动位置,这里我偷懒了~没有判断对话框和鼠标的相对位置,而是给了一个常量,这样每次开始拖动时,对话框会稍微"瞬移"一下,有兴趣的朋友可以帮忙完善一下,呵呵。
最后,是关于对话框内容区域的创建:
var divContent = document.createElement("div");
divContent.style.textAlign = "center";
divContent.style.padding = "15px";
divContent.style.fontSize = "12px";
if (springweb_typeIsIE) {
divContent.style.height = parseInt(dialogHeight - 25) + "px";
} else {
divContent.style.height = parseInt(dialogHeight - 55) + "px";
}
divContent.style.backgroundColor = "#ffffff";
if (springweb_typeIsIE6 || springweb_typeIsIE7 || springweb_typeIsIE8) {
divContent.style.filter =
"progid:DXImageTransform.Microsoft.Gradient(gradientType=1,startColorStr=#FFFFFF,endColorStr=#C2E2F8)";
} else if (springweb_typeIsFireFox) {
divContent.style.backgroundImage =
"-moz-linear-gradient(left,rgba(255,255,255,1),rgba(194,226,248,1))";
} else if (springweb_typeIsWebkit) {
divContent.style.backgroundImage =
"-webkit-gardient(linear,0% 0%,100% 100%,from(#FFFFFF),to(#000000))";
}
divContent.innerHTML = msg + "<br /><br />";
divDialog.appendChild(divContent);
var closeButton = document.createElement("img");
closeButton.style.cursor = "hand";
closeButton.setAttribute("src", springweb_basePath + "/images/okButton.png");
closeButton.setAttribute("alt", "确定");
//the click event when the dialog is closing.
closeButton.onclick = function() {
document.body.removeChild(divBackground);
document.body.removeChild(divDialog);
document.body.style.overflowY = "";
};
divContent.appendChild(closeButton);
divDialog.focus();
document.body.appendChild(divDialog);
这里应该不用多做解释了,稍微说一下,就是在13-22行的代码,这个是根据不同的浏览器来分别实现渐变效果,IE的话,用微软提供的渐变,Webkit或者Gecko内核的浏览器使用相应的CSS3标准也可以实现渐变效果。
最后嘛,这个方法支持大多数浏览器,个别浏览器如果不能完全支持,还请各位见谅,期待大家有更加完善的方法一起讨论,下面是一个示例,有兴趣的朋友可以看看。转载请注明出处~
示例文件:JS对话框实现